Curling cream can be made at home using natural ingredients like coconut oil, aloe vera gel, and flaxseed gel. These provide hydration, hold, and frizz control. Homemade curl cream is blended from emollients like shea or cocoa butter for moisture and conditioners like honey to smooth hair cuticles.
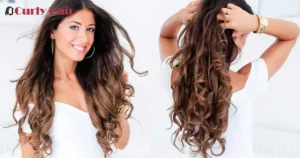
Want to define, frizz-free curls without store-bought products? Learn how to make hair curling cream at home using nourishing natural ingredients. Get recipes for DIY curl cream using emollients like shea butter, aloe vera, and flaxseed gel to condition, smooth, and define coils.
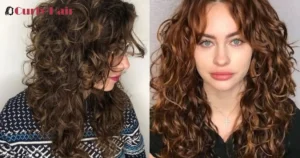
Achieve defined curls with homemade curl cream. Keep reading to get recipes for DIY curl enhancers using natural ingredients that hydrate, smooth, and control frizz. Learn how to customize curl cream with oils and butter. Boost your hair’s texture affordably with ingredients from your kitchen today.
Key Takeaways
- Homemade curling cream offers salon-quality results without the hefty price tag.
- Customize ingredients for a product that suits your hair type perfectly.
- Crafting the cream is easy, requiring common household items and minimal effort.
- Experiment with proportions to fine-tune the cream for your preferred curl intensity.
- Keep your creation fresh by storing it in an airtight container away from sunlight.
Preparing Essentials
| Ingredient | Quantity |
| Conditioner | About half a cup |
| Coconut Oil | 1 tablespoon |
| Aloe Vera Gel | 2 tablespoons |
| Clean Bowl | 1 |
| Stirring Utensil | 1 |
| Airtight Container | For Storage |
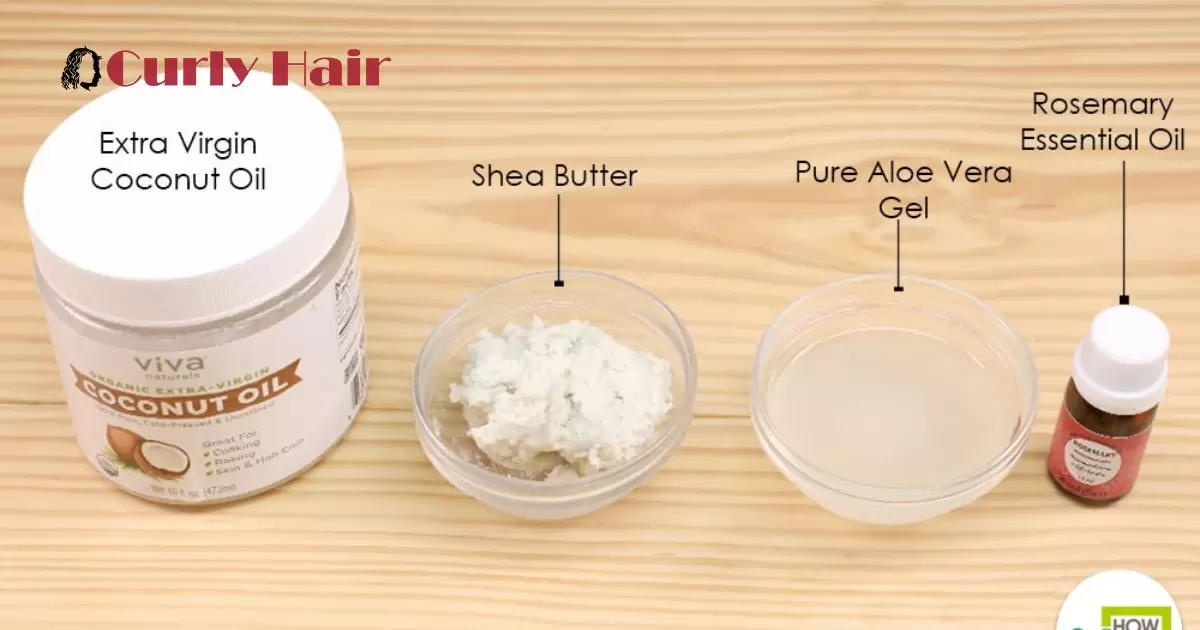
To prepare the essentials for making hair curling cream at home, start by gathering your ingredients. You’ll need natural components like shea butter, coconut oil, and aloe vera gel. These ingredients work together to moisturize and define curls, giving your homemade cream a healthy and nourishing foundation.
Next, ensure you have the right tools on hand. A heat-resistant mixing bowl, a whisk for blending, and a clean, airtight container for storage are crucial. Using the appropriate tools ensures a smooth and effective preparation process. With your ingredients and tools ready, you’re set to delve into the simple yet rewarding journey of creating your personalized hair curling cream.
Gather Ingredients
To start concocting your homemade hair curling cream, the first step is to gather all the necessary ingredients. Keep it simple, and you might already have most of them in your kitchen. Retrieve a cup of coconut oil a splendid moisturizer for your hair. Next, secure half a cup of aloe vera gel, known for its hydrating and conditioning properties.
Then, reach for two tablespoons of mousse and curl cream together, prized for its richness. Finally, procure a tablespoon of honey, a natural humectant that adds shine to your curls. With these ingredients in place, you’re ready to move on to the next stage of crafting your personalized hair curling cream.
Measure Accurately
When creating your homemade hair curling cream, DIY curl activator precise measurements are essential. Grab your measuring tools, whether cups or spoons and ensure accuracy. This step sets the foundation for a successful concoction.
Accurate measurement guarantees the right balance of ingredients. Too much or too little can affect the cream’s effectiveness. Whether it’s oils, butter, or styling agents, follow the recipe diligently. Your commitment to precision ensures the perfect blend for luscious, well-defined curls.
Organize Tools
Organizing your tools is the essential first step in creating your homemade hair curling cream. Start by laying out all the necessary ingredients in a clean and well-lit workspace. This ensures you can easily access everything you need, streamlining the process and preventing any last-minute searches.
Once your ingredients are in order, focus on arranging your tools systematically. Place mixing bowls, measuring cups, and stirring utensils within arm’s reach. This systematic arrangement minimizes the risk of overlooking any crucial element during the preparation. With a well-organized setup, you’ll find yourself effortlessly navigating the process, leading to a smoother and more enjoyable experience in crafting your personalized hair curling cream.
Choosing Ingredients
When selecting ingredients for your homemade hair curling cream, opt for those with nourishing properties. Start with a base of DIY curl-defining cream, known for its moisturizing benefits. This forms the foundation for a cream that not only helps in curling but also promotes overall hair health.
Consider the versatility of aloe vera gel as a key ingredient. Its hydrating qualities contribute to defined curls without the stickiness. Add in a few drops of essential oil, like lavender or rosemary, for a pleasing scent and potential additional benefits for your hair. The right ingredients set the stage for a curling cream that enhances your hair’s natural beauty.
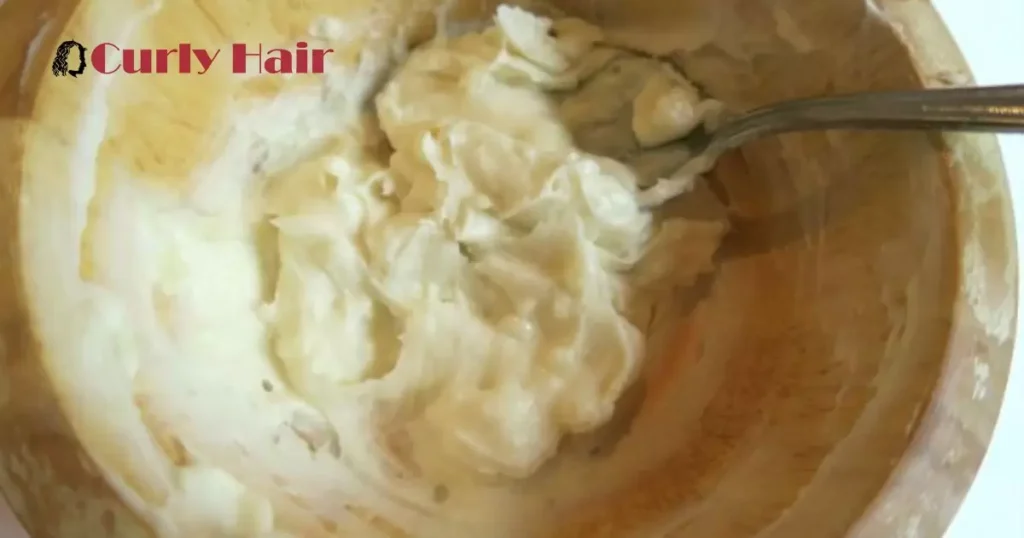
Mixing The Base
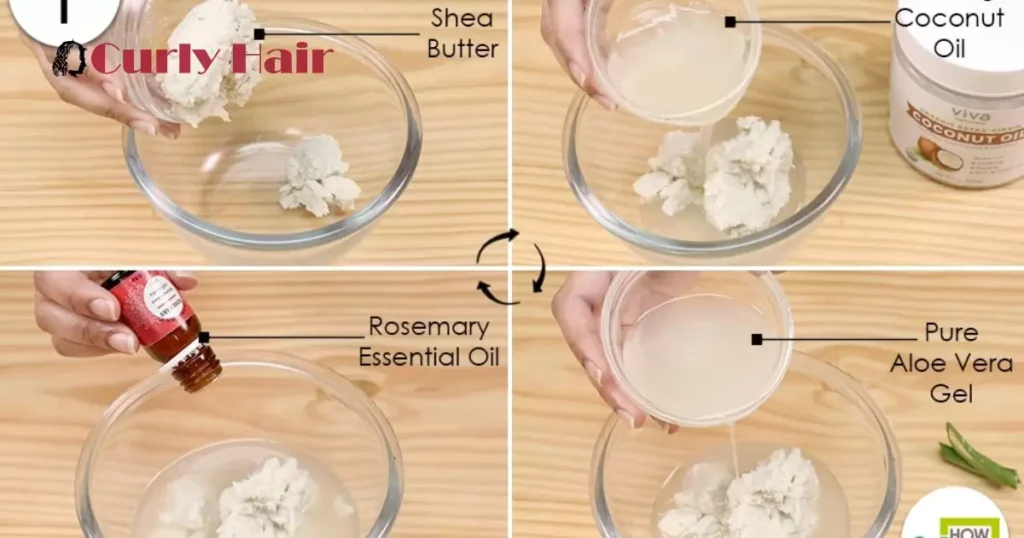
- Begin by getting a clean bowl ready for the preparation.
- Pour approximately half a cup of your preferred conditioner into the bowl.
- Enhance the mixture with a tablespoon of coconut oil, adding an extra layer of nourishment.
- Stir the ingredients diligently to achieve a seamless, creamy consistency, forming the base of your DIY hair curling cream.
- Introduce two tablespoons of aloe vera gel to the concoction.
- Aloe vera not only contributes to overall hair health but also aids in defining your curls.
- Blend the aloe vera gel thoroughly into the mix, ensuring it maintains its creamy texture.
- At this point, your homemade hair curling cream is taking shape, establishing the foundation for beautifully styled curls.
Adding Flavor & Fragrance
Infuse your homemade hair curling cream with delightful scents by incorporating natural flavors. Consider adding a few drops of essential oils such as lavender, rosemary, or chamomile for a fragrant touch. These not only impart a pleasant aroma but can also contribute to a soothing and relaxing experience during your hair care routine.
Experiment with ingredients like vanilla extract or citrus zest to bring a unique and refreshing fragrance to your DIY hair curling cream. The addition of these natural elements not only elevates the sensory experience but also complements the overall appeal of your homemade product.
By carefully choosing ingredients that add both flavor and fragrance, you can create a hair curling cream that engages multiple senses, making your beauty routine a truly enjoyable and personalized experience.
Adjusting Texture
Creating your hair curling cream allows you the flexibility to tailor its texture to your liking. Begin by selecting ingredients that align with your desired consistency. Opt for nourishing elements like coconut oil for a smoother texture, or beeswax for a thicker feel. Adjusting texture is pivotal, it ensures the cream is not too heavy or too light, catering to the unique needs of your hair.
Crafting the perfect blend involves experimenting with ratios. Start by adding small increments of ingredients and testing the texture after each addition. This hands-on approach empowers you to fine-tune the mix, achieving a result that aligns precisely with your preferences. Remember, the key lies in finding the balance that gives your homemade hair curling cream the ideal texture for effortless application and effective results.
Testing The Cream
Once you’ve crafted your homemade hair curling cream, the next step is putting it to the test. Start by applying a small amount to a section of your hair, ensuring even distribution from roots to tips. Gently scrunch or twist the hair to encourage curls. Allow it to set for a reasonable duration, giving the cream time to work its magic. Finally, observe the results of your hair’s natural texture enhanced by your DIY curling cream.
Apply On Small Section
When it’s time to test the cream, take a small section of your hair. Apply the homemade curling cream evenly from roots to tips on this chosen portion. Ensure thorough coverage, and then gently scrunch or twist the hair to activate the curling process. This targeted application allows you to gauge the cream’s effectiveness on a manageable scale before applying it to your entire head.
Check Curl Hold & Shine
After applying your homemade curling cream, assess its performance by checking the curl hold and shine. Scrutinize the curls to ensure they maintain their shape without excessive drooping. Look for a natural shine that enhances your hair’s vibrancy, signifying a successful homemade curling cream experiment.
Make Adjustments If Needed
Should you find the initial results not meeting your expectations, fear not. Experiment by adjusting the quantity of the curling cream – a little can go a long way. Too much may weigh down your curls. Also, consider tweaking the application technique, ensuring you evenly coat each strand. Small modifications can make a big difference in achieving the perfect curl.
Packaging & Storage
After successfully concocting your ideal hair curling cream, it’s time to think about packaging and storage. Opt for a clean, airtight container to preserve the freshness and efficacy of your creation. Consider using a jar or a small tub with a secure lid to prevent any potential leakage. This not only maintains the cream’s consistency but also ensures it remains ready for use whenever you’re in the mood for beautifully curled locks.
Store your homemade hair curling cream in a cool, dry place away from direct sunlight. This helps prevent any changes in texture or fragrance caused by exposure to heat. By taking these simple steps, you can extend the shelf life of your DIY curling cream, making it a reliable go-to for adding a touch of flair to your hair.
Frequently Asked Questions
Does salt water curl your hair?
Yes, salt water can naturally enhance curls in your hair due to its drying effect, which helps create texture and waves. The salt in the water alters the hair’s structure, resulting in a beachy, tousled look.
How to make curl cream without shea butter?
Create curl cream sans shea butter by substituting it with alternative moisturizing agents like cocoa butter or mango butter.
What can I use instead of curling cream?
You can use leave-in conditioner or mousse as alternatives to curling cream.
Conclusion
In conclusion, creating your homemade hair curling cream is a rewarding endeavor. By following the simple steps outlined in this guide on, how to make hair curling cream at home, you not only save money but also tailor the product to suit your hair’s unique needs.
Experimenting with ingredients like conditioner, coconut oil, and aloe vera allows for a personalized touch. Through the process of testing and adjustment, you can fine-tune the formula to achieve the perfect curls. Remember to store the cream properly to maintain its freshness and effectiveness. With your DIY hair curling cream in hand, you’re ready to embrace beautifully styled curls whenever you desire.